
How Rhino 3D Opened Up My Jewelry Design Process
A little while ago I decided it was time to level up my Rhino 3D jewelry design skills. I’d been tinkering away in Rhino5 for a while — clicking buttons, undos flying everywhere — and I knew I was missing some fundamentals. It’s fun to experiment, but when you’re designing actual jewelry for actual humans, “guess and hope” isn’t the most efficient workflow. So I signed myself up for a 6-week Rhino 3D course in NYC, and it completely changed the way I design.
Why I Took a Rhino 3D Course for Jewelry
As a metalsmith, I love working with my hands, sawing, soldering, filing, all the good stuff. But I also love what 3D modeling for jewelry can do:
- It lets me play with clean lines, angles and negative space before I ever touch the silver.
- I can test proportions on screen so a ring doesn’t suddenly turn into a tiny spaceship on your finger.
- For custom work, it means you can see your piece in 3D and request tweaks before we cast it.
I live in Jersey City, right next to Manhattan, which is basically continuing-education heaven, so after a bit of research I found a reasonably priced evening class at the School of Visual Arts. Six Tuesday nights, me, a laptop, and a room full of other design geeks. Bliss.
Inside the Rhino 3D Jewelry Design Course
(a.k.a. why I made a rubber duck)
Our teacher, John, is an architect who runs the Visual Futures Lab at SVA and teaches at Pratt. He’s been using Rhino for around ten years, and judging by his skills there’s not much he can’t model. To learn the tools properly, we didn’t start with jewelry. We started with:
- A canoe
- A rubber duck
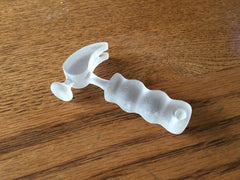
- A hammer
Yes, I did spend several evenings lovingly modeling a virtual rubber duck. No, I regret nothing.


The point was to understand how to build complex forms from simple shapes — which is exactly what Rhino 3D jewelry design is about too. Once you know how to create curves, surfaces, and clean intersections, turning those into rings, pendants or cufflinks becomes much more intuitive.
From Screen to Silver: 3D Printing & Casting
The rubber duck and the hammer were both 3D printed so we could see how our digital models behaved in the real world. It’s still a bit mind-blowing to watch a file turn into an object you can actually hold.
I’ve used services like Shapeways in the past to print models, and I’m always impressed by the detail they can achieve. You can see faint ridges from the layers, but for jewelry those are usually removed later, either before casting, or during finishing, with a bit of careful sanding and polishing.
For jewelry, the process usually looks something like this:
- Design in CAD (Rhino 3D)
- 3D print the model in wax or resin
- Cast it in metal using the lost wax method
- Clean up & finish by hand at the bench
So you get the best of both worlds: the precision of CAD jewelry design, and the hand-finished feel of artisan silver work.
What This Means for Your Custom Jewelry
Taking this course opened up a lot of new horizons for me. It gave me stronger foundations in Rhino, and with that, a lot more freedom to play, whether it’s a bold geometric ring or a quietly architectural pendant.
Since then, many of my pieces have started life as little digital sculptures on my screen before becoming sterling silver in my studio. It’s especially powerful for custom projects, where we can:
- Explore different design options quickly
- Adjust proportions (stone size, band thickness, etc.)
- Share screenshots or videos so you can “see” your piece from every angle before we commit
If you’ve ever thought, “I wish I could turn this idea into a piece of jewelry,” this is the tool that helps me do it. If you’re curious about custom jewelry design using CAD, you can read more about my process and see recent projects on my Custom Jewelry page.
And who knows, your dream piece might start life just like that rubber duck: as a slightly odd 3D model that becomes something beautifully wearable.


